How to Use Your Domain Email Address on Free Gmail
Gmail is a fantastic mail client, with a powerful UI and a ton of options.
A lot of people use it not only for their @gmail.com address, but also for their professional email address, completely for free. No paid Google Workspace account needed.
Don’t have a business email address yet?
This guide assumes you already have a working business email address. If you don’t, no biggie! You can create one in a few minutes. Hop to our post How to Create a Business Email Address for Free in 3 Easy Steps.
Ready? Go!
Step 1: Set a Copy Filter From Your Business Email Address to Gmail [30 seconds]
We’ll first make sure your Gmail receives messages sent to your domain email address.
Log in to your domain email service, and set an automated copy filter from your domain email address to your @gmail.com address.
The exact way to do that will depend on your domain email service. On postale.io that’s trivial to do, as shown below.
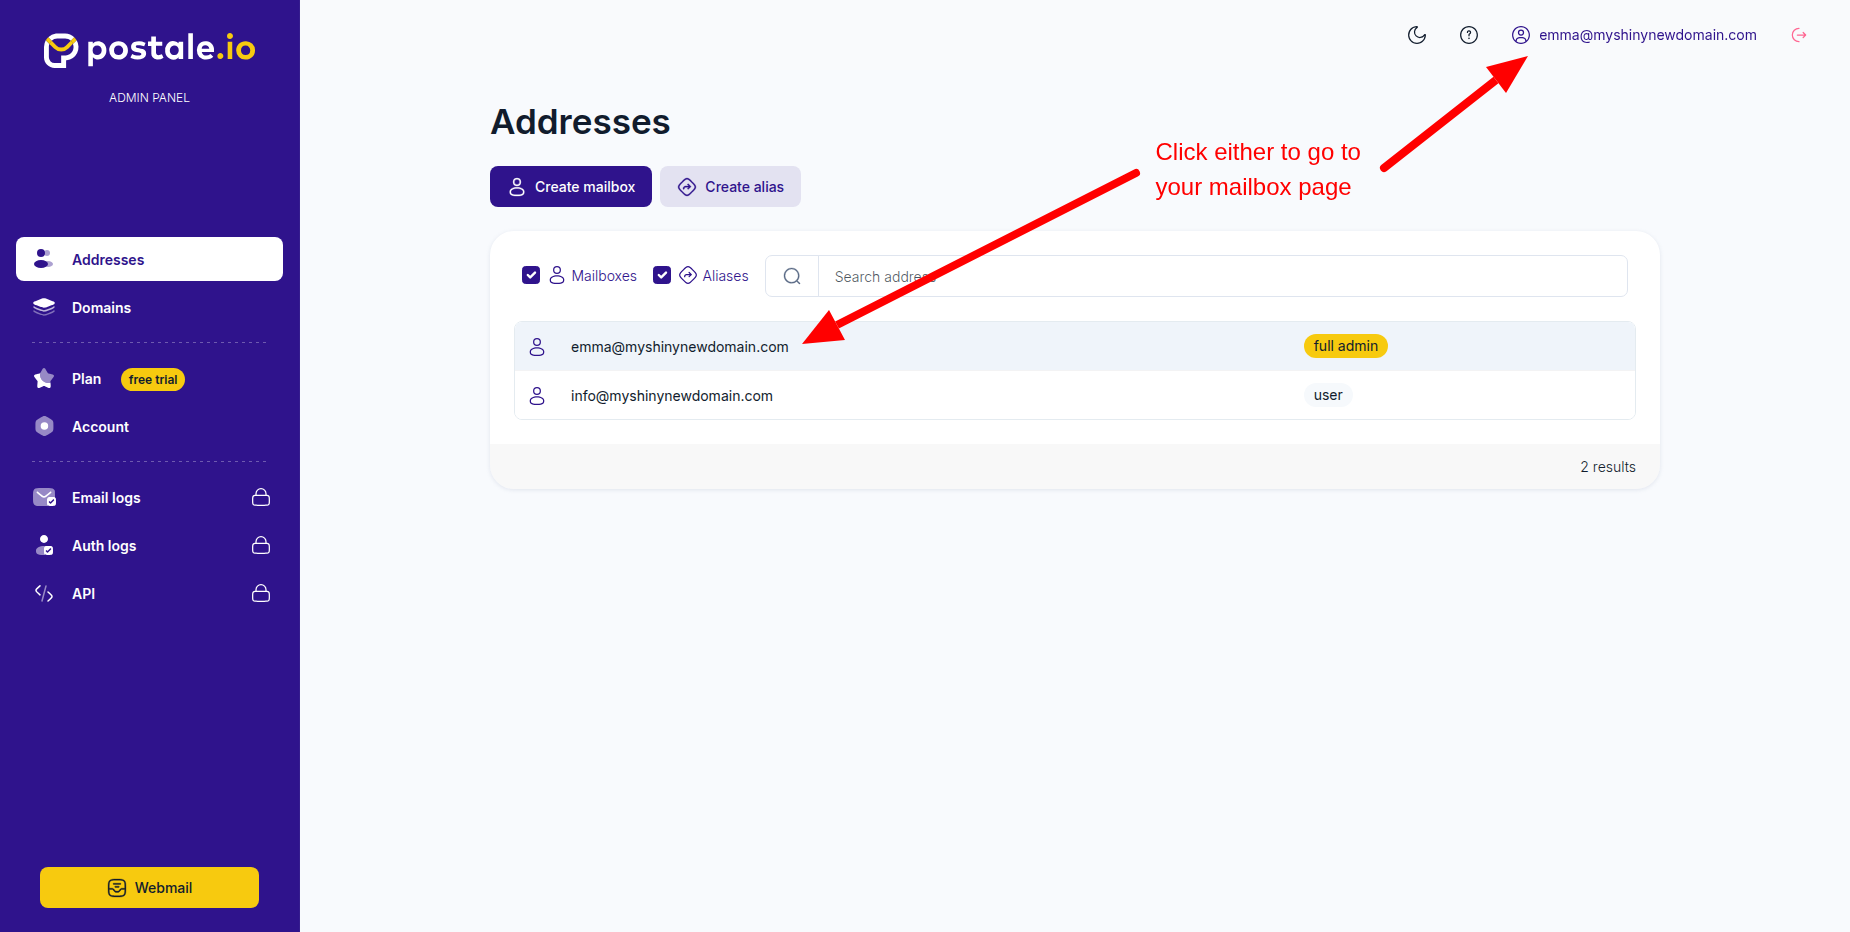
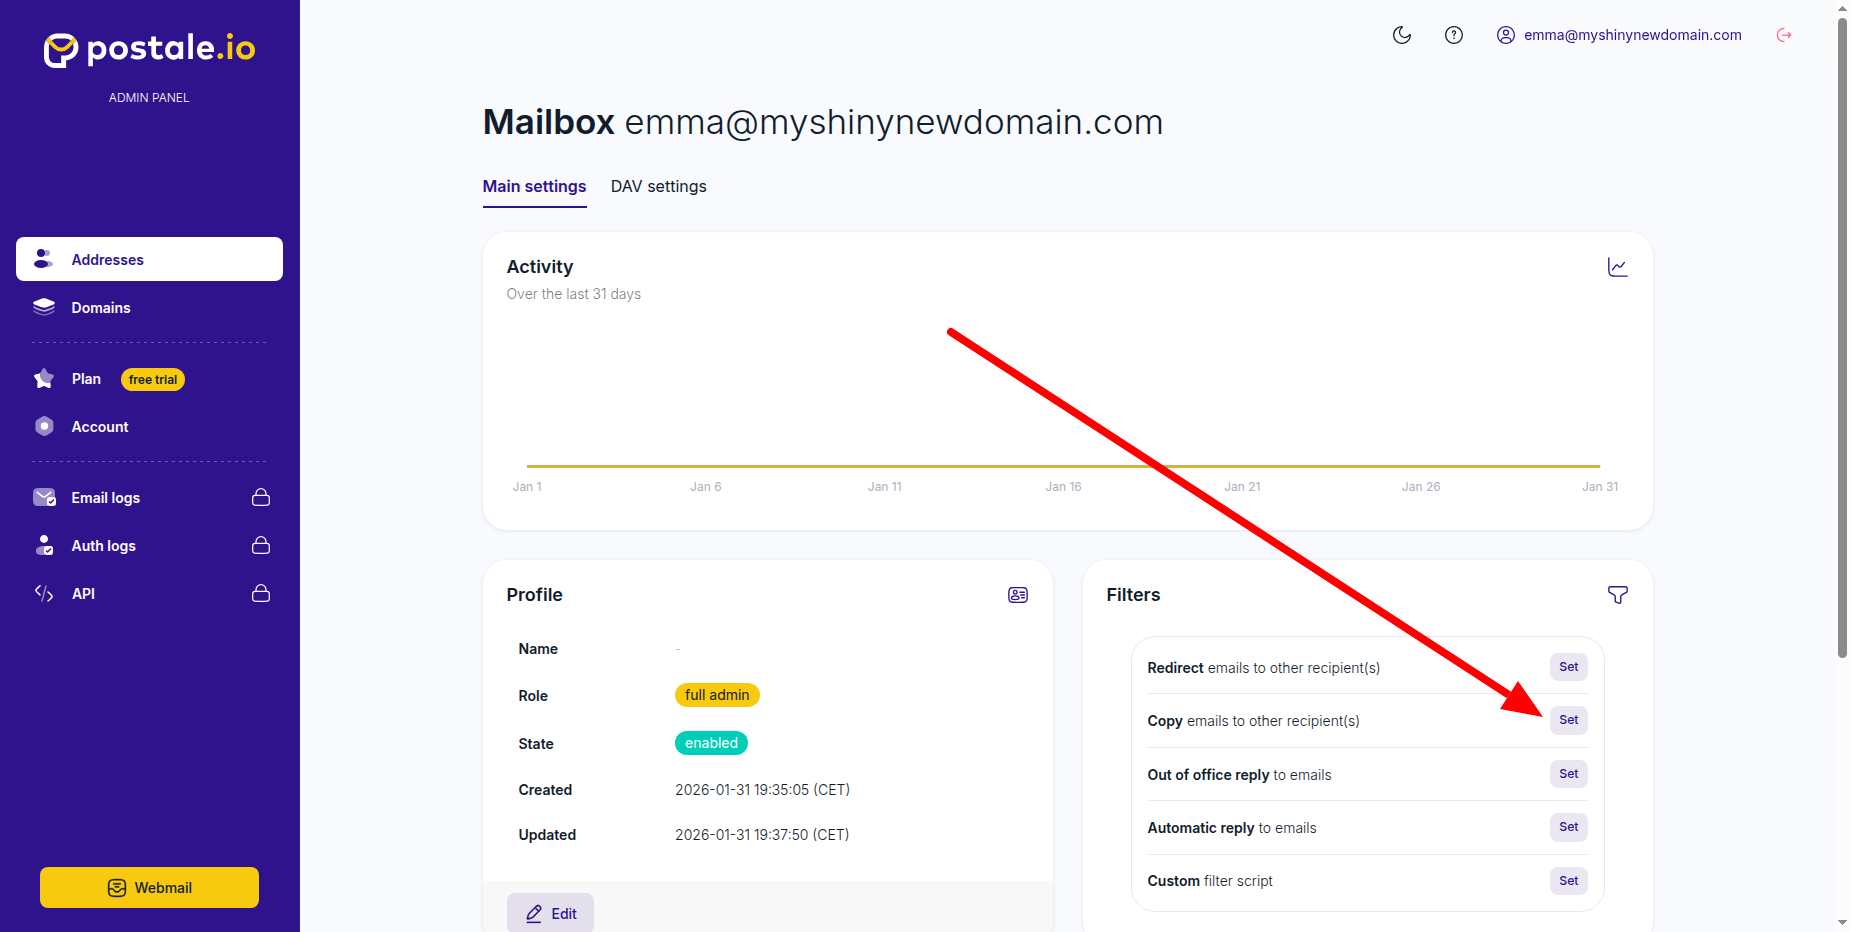
Log in to the admin panel, go to your mailbox page and in the “Filters” section, click the “Set” button next to “Copy emails to other recipient(s)”.
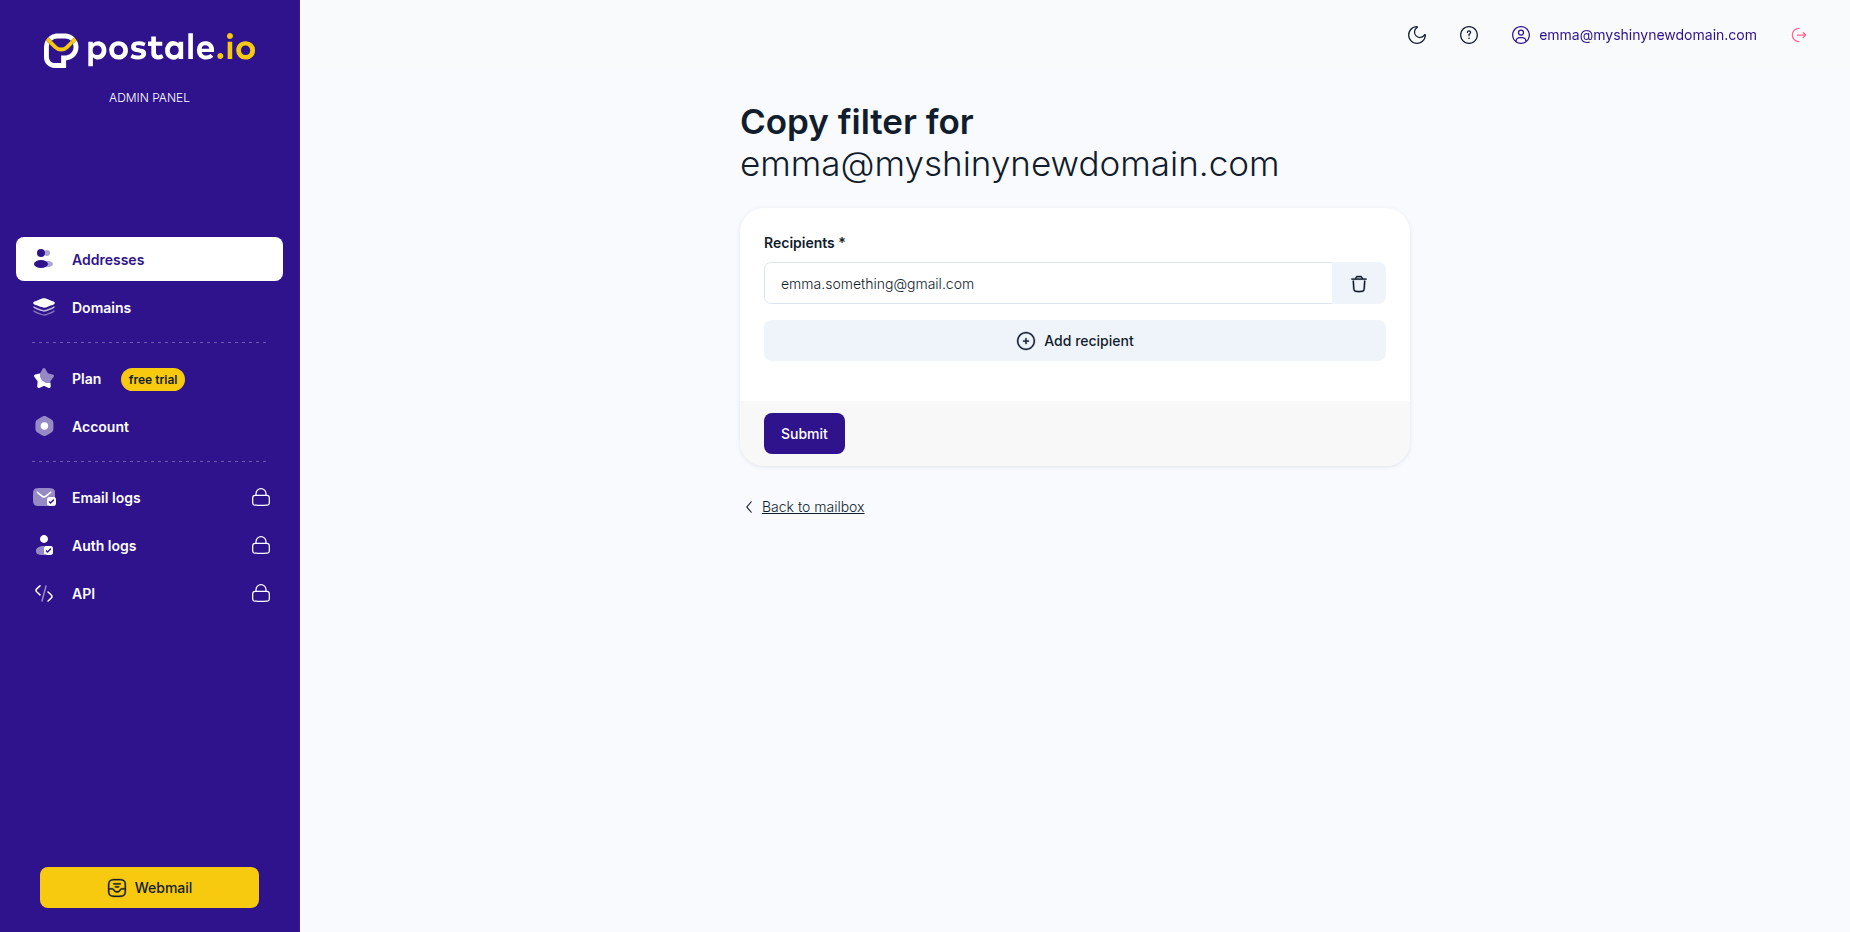
There, enter your @gmail.com address as recipient, and submit.
Great! Now, any message sent to your domain email will get a copy delivered to your Gmail as well.
So we’re good on the receiving side. Let’s see how to send as your domain email in Gmail.
Step 2: Add Your Business Email Address as Sender in Gmail [1 minute]
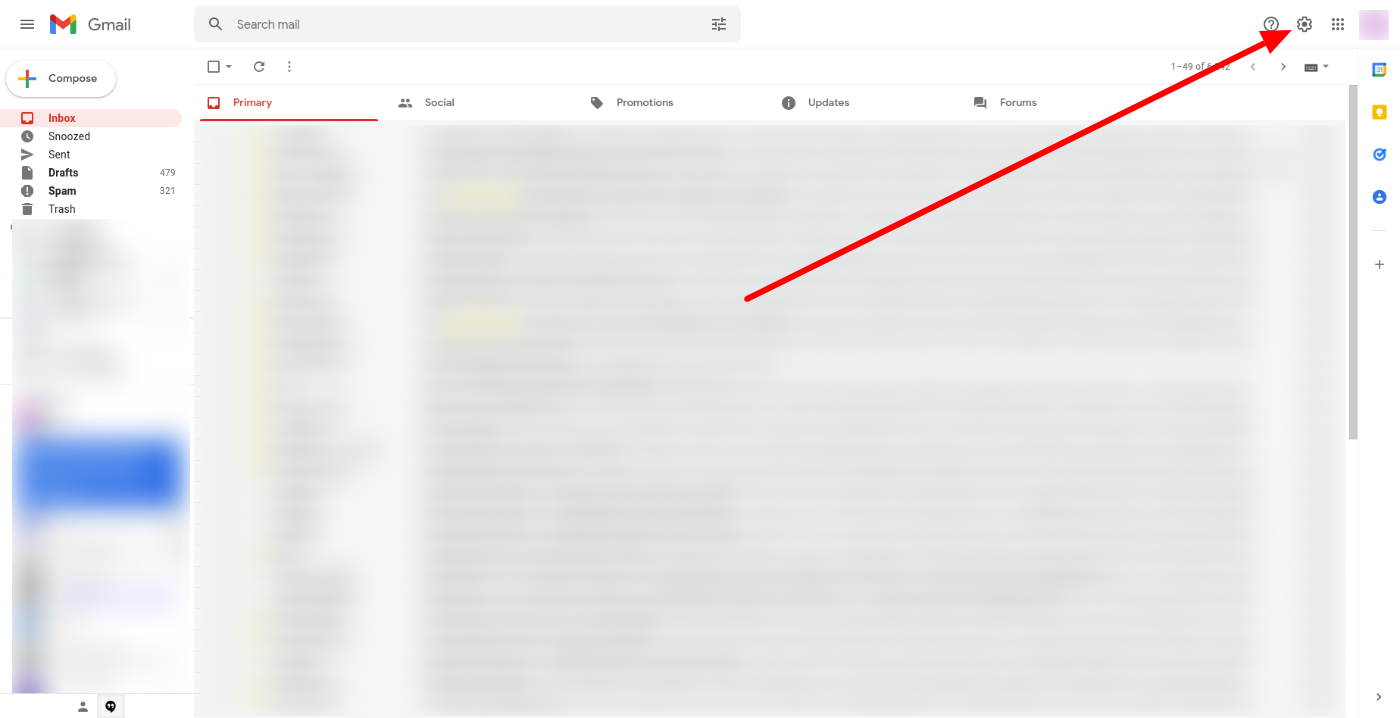
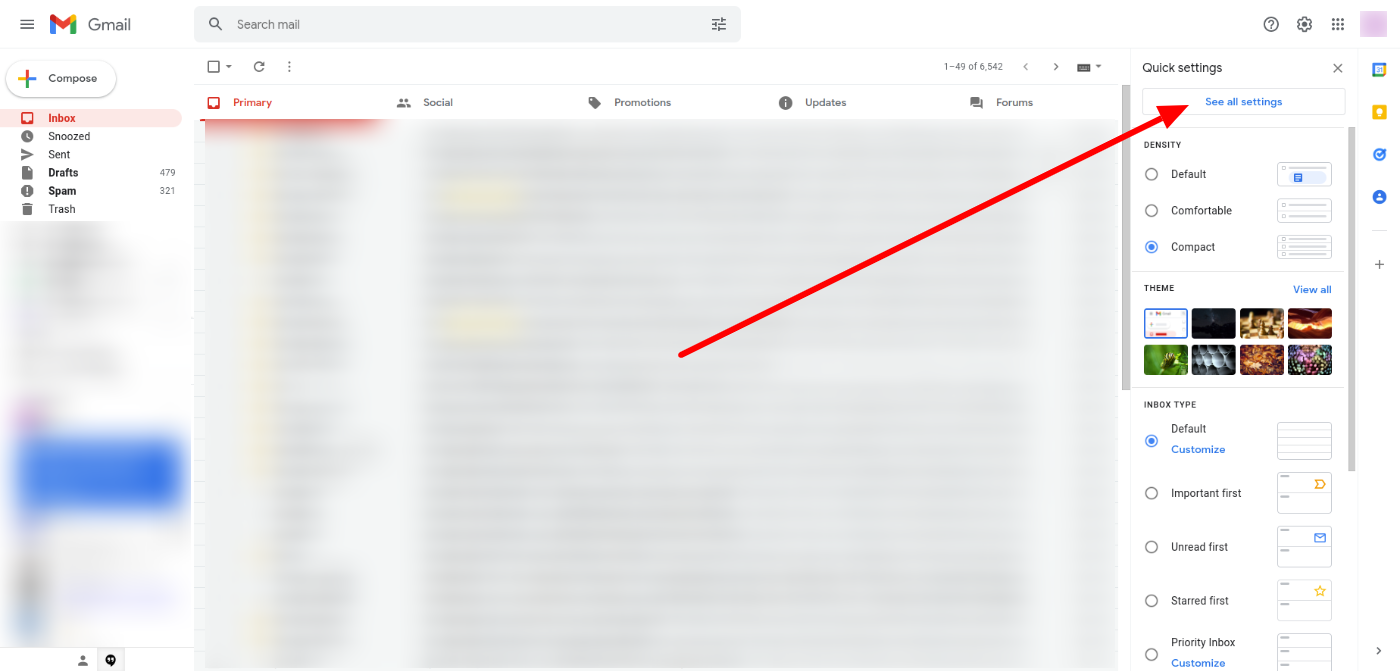
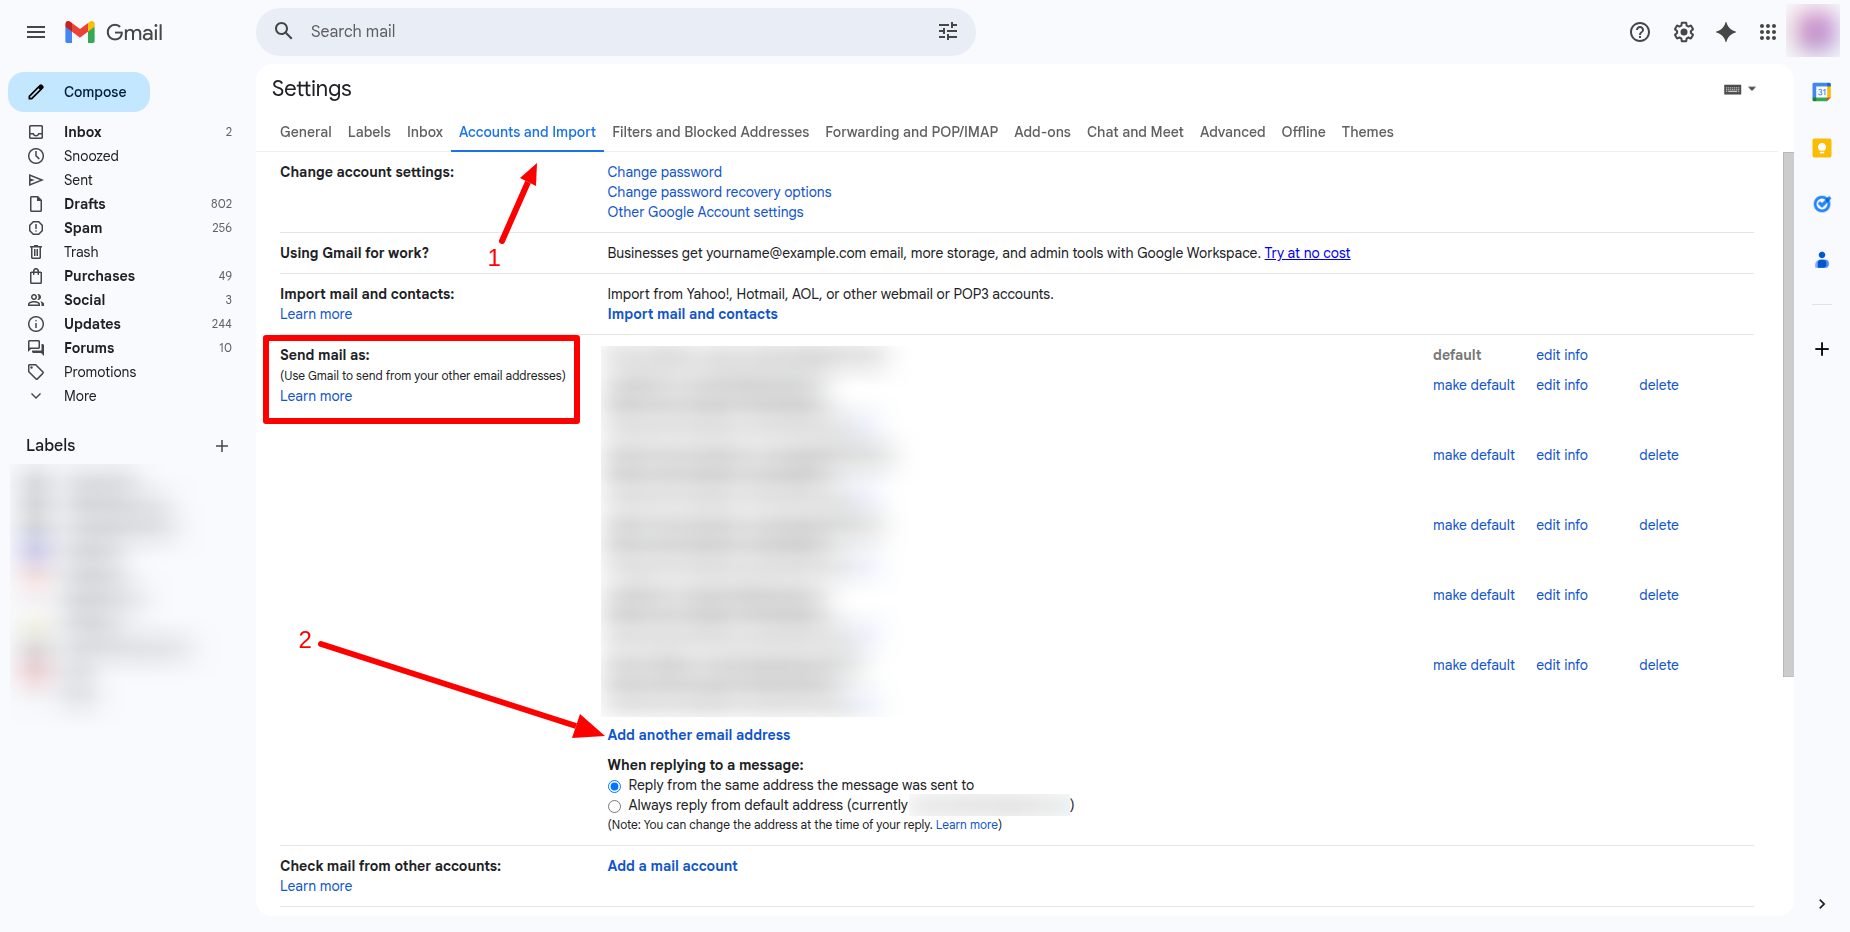
Log in to Gmail, and go to Settings > See all settings > Accounts and imports.
Then scroll down to the “Send mail as” section, and click Add another email address.
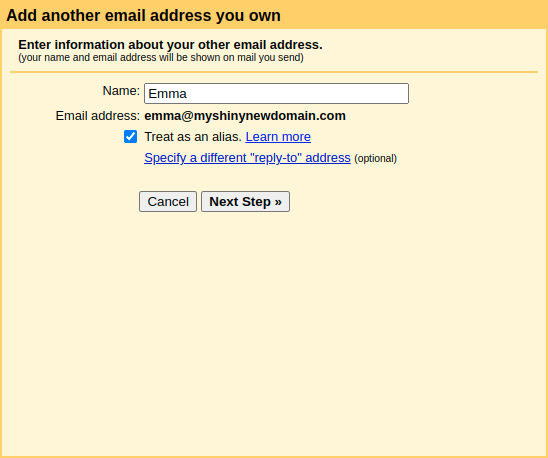
Gmail asks you to fill in a few fields in a popup, in a 3-step process. No worries, each step is super quick, it’ll take you no more than a minute.
Before you start, make sure you got the SMTP server settings of your domain email service at hand. For postale.io they’re listed here.
- Fill in the name to use when sending as your domain email address. We recommend leaving “Treat as an alias” checked, but that’s up to you (have a look here). Click Next Step.
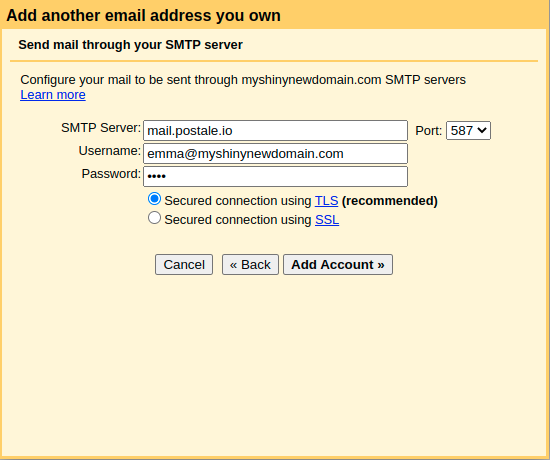
- Fill in your SMTP (outgoing) server information.
- SMTP server hostname.
- SMTP server port.
- Username. For postale.io that’s your full domain email address, including the domain.
- Password.
- Check “Secure connexion using TLS”.
- Click Add Account.
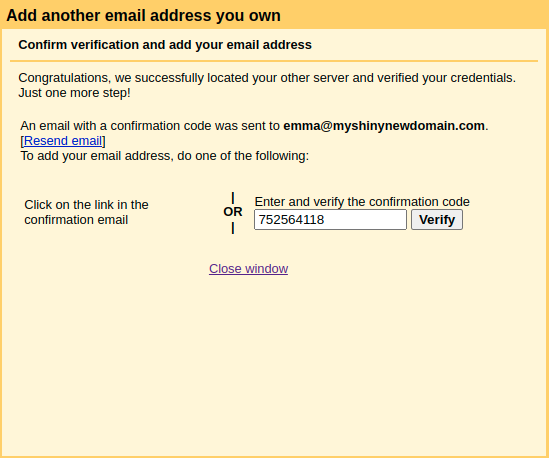
- Go to your domain email address mailbox from another mail client or webmail, copy/paste the verification code Google just sent you, and click Verify.
That’s it! You can now both send and receive emails with your business email address on Gmail. 🎉
To reply or send an email as your domain email address simply select it in the “From” drop down menu when writing an email.
Troubleshooting
If you’re experiencing issues you may find some valuable information on Google’s own documentation for the “Send mail as” feature.
Drawbacks: Mailbox Synchronization and Storage Space
There are two small drawbacks with this system that we must mention.
Since Gmail receives a copy of your messages instead of connecting directly via POP/IMAP to your mailbox, when you move, delete or send an email from Gmail, the change is not reflected on the server.
The first consequence is that an email moved, sent or deleted from Gmail doesn’t appear in your Sent or Trash or other folder on other mail apps or on your webmail. Conversely, if you move, send or delete an email from another app or your webmail, the change is not reflected on Gmail.
That’s not really an issue of course if you stick with using only Gmail.
The second consequence is that your emails use up space not only on the server of your domain email provider, but also on your Gmail account, separately. So when your mailbox gets big, you need to make sure you’re not running out of space on both systems.
What about the Gmail mobile app?
The configuration described above of the desktop version of Gmail applies automatically in your Gmail mobile app as well. Pretty convienient, right?
However, if you use only the mobile app, you could alternatively just add your domain email address as an IMAP account on the app.
We can’t do that on the desktop version of Gmail because it doesn’t support adding external IMAP accounts—only the mobile app does.
Note
Gmail desktop used to support external POP accounts, but that was discontinued in 2026. Now an automated copy or forward is required to receive messages sent to your domain email address in Gmail.
Bonus 1: Set a Profile Picture
Need to set a profile picture for your business email address freshly added to your Gmail? Sure, we can do that!
Note
Profile pictures actually depend on the mail app used by your recipients. With Gmail for instance, only people using Gmail to open your emails will see your Google account profile picture (or people using another app also fetching the Google profile picture).
You have two options, depending on whether you want to use the same profile picture as the one used on your @gmail.com address or use another one:
- Add your domain email address as an alternate email in your Google account. Then your usual Google account profile picture will show up to Gmail users when you send from your domain email address.
- Create a new Google account with your domain email address (select the “Use my current email address instead” option), then:
- Login to that new account and open Gmail (you’ll be asked to choose an @gmail.com address and your domain address will become an alternate address of that account).
- Perform the steps mentioned earlier to add your domain address to that account’s Gmail.
- Add a profile picture to the account. That profile picture will show up to Gmail users when you send from your domain email address.
Bonus 2: Add a Signature
Need to add a signature for when you send from your domain email address on Gmail? Easy peasy!
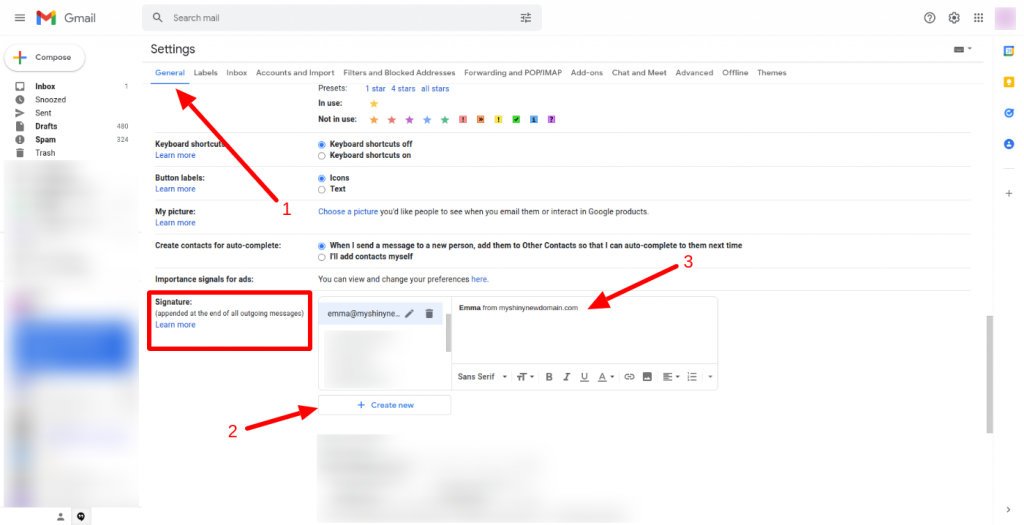
Go to Settings > See all settings > General. In the “Signature” section, click the Create new button and fill in your domain address.
The address then appears in the list above the create button, select it and you can type your signature on the right.
If you want an HTML signature (colors, images, and so on), you can create it elsewhere an copy/paste the rendered HTML in the textarea, it’ll work.
Over to You
I hope this guide has helped you with your Gmail integration. What do you think? Did we forget to mention something? Are there some other mail apps you’d like us to cover?
Related Posts
-

How to Create a Business Email Address for Free in 3 Easy Steps
Have you been trying to create a domain email address and find the process cumbersome and/or the service unreliable? Have you had difficulties doing it for free or at a low cost while still having all the basic features anyone needs like the ability to use any mail app? Well, you’re not alone! I have…
-

The postale.io Alternative to The Discontinued G Suite Legacy Free Edition
Google recently announced they would soon put a stop to their G Suite legacy free edition, initially created when they stopped offering free G Suite accounts back in 2012. Users of that edition are thus faced with the choice of either upgrading to Google Workspace or leave to another domain email provider. This has left…
